Saturday, November 28, 2015

Mama's Creamy Artichoke Soup


Every holiday feast when I was growing up started the same way-- the first thing in people's mouths was my Mama's Cream of Artichoke Soup. It began as an adaptation from The Plantation Cookbook, and eventually ended as her own recipe. My mother is no longer with us, and so this holiday season, I've taken up the Artichoke Soup and am now reinventing it as my very own. Consider this recipe a translation of a translation.

Mama's Creamy Artichoke Soup

Ingredients

1 (14oz) can artichoke hearts, mashed(I use Reese)
6T butter
1 cup diced onion
1 cup diced celery
6T flour
5.5 cups chicken stock
1/4 cup lemon juice
salt 
pepper
1/4 tbsp fresh Thyme
1/4 tbsp fresh Rosemary
1/4 tbsp Worcestershire
2 eggs
2 cups evaporated milk
1/4 cup dry sherry (I recommend Lustau Palo Cortado)

Method

In a stock pot, melt butter and saute onion and celery until translucent. Add flour, stir to coat, and cook for one minute. Add stock, artichokes, lemon juice, Rosemary, Thyme, and Worcestershire as well as salt and pepper to taste (appx 1tsp each). Cover and simmer for 20 minutes. Meanwhile, beat two eggs, then combine with evaporated milk. Take soup off heat, and puree either in food processor or with immersion blender until smooth. If necessary, strain with a slotted spoon to make sure all chunks have been removed. Working carefully to temper your egg/milk mixture, take a ladle-full of pureed soup and incorporate it into your egg/milk mixture. Continue slowly until egg/milk mixture has been brought up in temperature and eggs have not scrambled (approximately 5-6 ladle-fulls of soup). Then, pour egg/milk mixture into the remaining soup puree and stir to combine. Return to heat, add sherry, salt, and pepper to taste. Simmer for 10 minutes. 

Tradition is to serve it in coffee mugs and consume lazily standing around the kitchen getting in people's way while they cook.


Monday, November 23, 2015

Down South Gift-Giving Guide for Foodies & Drinkies

Down here we love to cook. Almost as much as we love to drink! Give us a chance and we'll incorporate both into any event that we can!

This list is a compilation of my greatest holiday gift-giving hits for people who enjoy crafting both great food and drink.

Great Books:

The Encyclopedia of Cajun & Creole Cuisine by John Folse
$70
Folse is a renowned southern writer and chef, and in his best-selling work, he takes you through the ins and outs of crafting classic southern cuisine. An absolute must for any gourmet chef (or wannabe) in your life.


But Always a Fine Bourbon by Sally Van Winkle Campbell
$75
A lovely pictorial jaunt through the history of one of the world's most famous distilleries. A gorgeous table book that also gives great insight into the inner-workings of the First Family of Bourbon.


Cooking in High Cotton by The Junior League of Monroe
$25
A southern gal's best friend, Junior League cookbooks are the gold standard for regional specialties. This one is a delicious and sumptuous production for all senses. If you're looking for Aunt So-and-so's best recipe for Cream Puffs, look no further. 


Gifts for Grub:

$9 for 1.4oz jar
A small chef/owner run salt company based in Lafayette, LA that specializes in sea salt from the Gulf. On occasion the company also produces specialty salts from other regions that they fancy, such as oyster beds.


$8 for 1/4lb sack
Brainchild of Keith Holiday and based on a rediscovered family recipe, this sweet, salty, crispy treat is the perfect snack as you await the Christmas dinner to finish cooking. Fantastic for cooking, and great alone, these pecans are 100% organically farmed in Colfax, Louisiana by the Holiday family.


The Oyster Bed Oyster Plate
$70 for Half-Dozen (Le Petite) plate
Developed by an idea hatched over seafood and family, this item was specially designed and crafted by legendary forgery Wilton Armetale. The resulting plate is light, durable, and can withstand temperatures of 1000 degrees. Plus, and proceeds from each sale go to directly repairing oyster habitats in the Gulf. Did I mention they are also gorgeous pieces of work?!


For your Special Sippers:


$20
Add a bit of whimsy to your next stirred (not shaken) cocktail with these whimsical sets of horse or dog cocktail stirrers. Each is different, so choose your steed wisely! This cute gift can turn any day into derby day.


Rhino Coffee 1lb Bags (rotating selection)
$12.99/lb
Rhino coffee is a small independent coffee house and roaster established in Shreveport, LA. The blends are diverse and delicious, and bring out the long history of coffee's journey to the American south from the "horn" of Africa.


$13/16oz
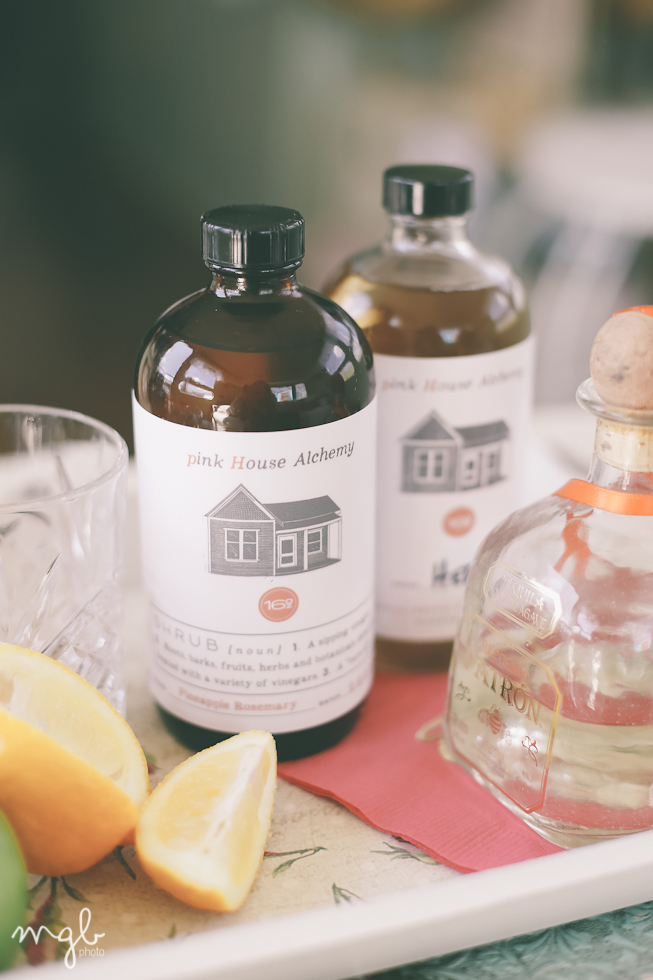
A curious offshoot from the University of Arkansas Food Science program, these lovely flavorful cocktail mixers fill an important niche in the southern booze-scape. Our current favorite is the Blood Orange & Clove simple syrup. Their line-up is delightfully seasonal, so there's always something new.


Sunday, November 22, 2015

Easy One-Hour Cable-Knit Headband

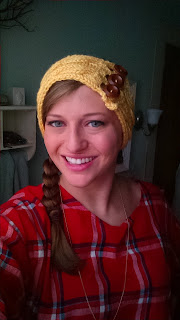
Everyone appreciates something homemade for the holidays, and when cold weather hits, soft knits are always in fashion. A scarf is always nice, but the gals in your life will really adore you for a cozy knit headband that keeps their ears warm and also looks super cute.

In addition, what's better than a stylish headband that you can make in an hour?!


Cable-Knit Headband Knitting Pattern

  • Size 8 knitting needles
  • 3 buttons (1 inch)
  • Cable knit hook
  • 1 skein yarn (4 weight) I used Vanna's Choice.
Cast on 24 stitches. 
First row knit all, second row purl all. Repeat 3 more times until you have 8 rows on your needles. 

Working pattern:
Row 9:   K4, P6, K4, P6, K4
Row 10: P4, K6, P4, K6, P4
Row 11: K4, P6, K4, P6, K4
Row 12: P4, K6, P4, K6, P4
Row 13:K4, P6, K4, P6, K4
Row 14: P4, K6, P4, K6, P4
Row 15:K4, P6, K4, P6, K4
Row 16: TURN ROW

Turn Row:
P4, slip 3 stitches onto cable knit hook, and be sure to hold stitches in front of work. Knit the following 3 stitches not on the hook. Taking care not to twist the stitches, knit the 3 stitches on the cable knit hook. This becomes your first cable. P4. Repeat slipping 3 stitches onto cable knit hook, knit the following 3 stitches off needle, knit 3 stitches off cable knit hook (again, making sure not to twist work), P4.

Repeat working pattern until work equal 20in.

K entire row, P entire row, K entire row.

Now to create your button holes:
P3, bind off 4 stitches, slip final bound off stitch loop back onto left needle, P3, bind off 4 stitches, slip final bound off stitch loop back onto left needle, P3, bind off 4 stitches, slip final bound off stitch loop back onto left needle, P3. 

K3, cast on 4 stitches in work (see below for video), K3, cast on 4 stitches, K3, cast on 4 stitches, K3.


See above for casting on while in the middle of working

P entire row, K entire row, P entire row. Bind off.

Using quilting thread, sew on your center button first, making sure it aligns with your buttonhole, and is on the right (cable) side of the headband. Using this first button as a guide, center and sew the two other buttons on either side.

Ta-Da! Your very own comfy, cozy, hand-made head warmer that you can make yourself in the span of a Disney movie!

Monday, November 16, 2015

The Satsuma Sidecar

Recipe makes two cocktails!

sat·su·ma
satˈso͞omə,ˈsatsəmə/
noun.    a tangerine of a hardy loose-skinned variety, originally grown in Japan. Also grown commonly in the American Southeast.

Satsuma Syrup 
*A modification of Ina Garten's Marmalade Recipe

Yield: 8 (10oz) jars

2lb ripe Satsumas
2 lemons
8 cups water
8 cups sugar

Special Equipment:
8 (10oz) Mason Jars with lids (sterilized)
Jar Funnel and Tongs (sterilized)

Method:
Cut satsumas and lemons in half crosswise, then into very thin half moon slices. Discard any seeds as you go. Place the sliced fruit and their juices into a stainless-steel pot. Add 8 cups water and bring the mixture to a boil, stirring often. Remove from heat and stir in the sugar until it dissolves. Cover and allow to stand overnight at room temperature.

The next day, bring the mixture back to a boil. Reduce heat to low and simmer uncovered for about 2 hours. Turn heat up to medium and boil gently, stirring often for 30 minutes, and skimming off any foam that forms on top.

Remove from heat, and ladle into sterilized jars and seal. The heat from the syrup should cause the lids to seal, but if not, boil completely sealed and submerged for 5 minutes. Once sealed the syrup is shelf-stable for up to one year.


Saturday, November 7, 2015

Get Out(side) While You Can!

Fall in Louisiana-- the delightful 4, and if you're lucky, 6 weeks in the latter part of the year where the weather is delightful and the mosquitoes don't immediately drain you dry!

Alexandria happens to be just on the south side of Kisatchie National Forest, and one fine weekend recently, we drove the half-hour northwest to hike the Backbone Trail. It's located within the Kisatchie Ranger District (the proper one) and also within the Red Dirt Wilderness Area. The hike is technically an out-and-back hike, but the trail intersects on either end with park road 339, turning the trail into an approximately 10 mile hike.


The trail offers spectacular views of the longleaf pines that Kisatchie is known for. There are numerous elevation changes with craggy limestone traverses that in the rainy season double as washouts. The trail is open to bikers and horseback riders as well, so you may encounter some horseflies. Our advice-- wear long sleeves and a good bit of bug spray. Also, avoid wearing blue! Because of God-knows-why, horseflies and deerflies are attracted to the color blue!


On this particular day, it was evident that a recent control burn had taken place about a month previous. The trees were charred, and seedlings had begun to sprout from the remains of felled pines. It was a lovely, brisk day for a somewhat challenging hike, and we'll definitely be back to see how the new reborn forest grows up!


Kisatchie Ranger District Information
Map of Trailhead

Saturday, October 31, 2015

A Cushy Tushy Makeover

While undertaking the slow-but-steady clean up and renovation of our house, I occasionally come across old furniture in desperate need of some TLC.

Recently, I found these old ottomans that were covered in bad 90's polyester cloth that itself was covered in, well... traces of the cat that lived in the house for some years. Apparently bad upholstery made the cat sick to its stomach as well.

Sad, filthy ottomans.

The legs and structures underneath were sturdy and in good shape, so I set to task disassembling and removing the unmentionable fabric (if you can call it that in its current state). What you'll need for this very basic upholstery job:

Needle-nose Pliers
Flathead screw driver
Staple gun with staples
2.5 yds upholstery fabric of your choice
5yds batting (not loose, rolled, similar to interfacing)
Measuring tape
Sharp, fabric scissors


Step 1:
Removing the fabric and staples. This is easier said than done. My most used technique was inserting the flathead screwdriver under the staple, prying it loose as much as I could, and using the pliers to yank the rest out. You will need to remove all (yes, all) of the staples attaching the upholstery, as you don't want them to interfere with your new staple job.

Cleaned up and ready to go
Step 2:
Lucky for us, the legs were in decent shape but needed a bit of polishing. At this point, you may decide to paint the legs, or re-stain them. If so, you will need a mid-corse grade sandpaper, a fine grade, and if you are using stain, a good stain and possible denatured alcohol. If you are painting, I would prep with a bit of primer, let dry, then gently coat with paint. You also may choose to spray-paint, just make sure you don't use one with too much gloss or spray too close.

Step 3:
Measuring and cutting your fabric. You are going to need two basic measurements to cut the correct size of upholstery fabric-- the depth and width of the piece, including the sides you need to cover. Measure the front, top, and back of the piece. Add AT LEAST three inches to the fabric. Same goes for the sides. Measure both sides and width, and don't forget to add your three inches for room. Now you have the measurements for your fabric box!

PRO-TIP: center your measurements around a central point in your design that you'd like to feature on the top/middle of your furniture. Nothing is worse than an askew fabric job!

Step 4:
Attaching your batting. I made two attachments of batting to my ottoman, adding a bit on the sides (though it is unnecessary, I just wanted a plusher look). I cut squares of rolled batting in the shape of the very top of my ottoman, leaving about 1/2in of hangover on either side. I made about 6 such squares, and secured them with staples using the 1/2in overhang on the sides of the ottoman. For the plush look, I cut a square exactly the size of the upholstery fabric.

Step 5:
Attaching the upholstery fabric.  Find a large, flat space free of snags or splinters that may pull your upholstery fabric. My dining table topped with a quilting mat worked well. Center the upholstery on your work surface, right-side down. If you are using the extra piece of batting, center this on the wrong side of the upholstery fabric. On top of this, center your now-fluffed piece of furniture that you would like to cover. CENTER, CENTER, CENTER. Should I say it again? Working with the long sides first, fold 1/2 inch of the fabric in, and pull taught up the side of the piece. Staple. Keep working from the center stapled point, making sure to keep the fabric (and batting) taut and making sure not to move the center of the fabric. Stop attaching the fabric 1in before reaching the legs. You will need this room to correctly adjust your side folds. Repeat on backside.

Finishing the ends-- You're going to treat this area like you're wrapping a present. Fold in the remaining fabric around the leg attachments, making sure to keep your exposed cut ends taut and well-folded.  At this point, you want to eyeball the last fold to make sure no wrinkling occurs. Once you've established the best "lay" of the fabric, staple to secure the remainders of side fabric before folding up and finishing the final flap, making sure the staples won't be exposed. Be sure to turn in 1/2 in of the fabric to create the no-fray clean line. The last flap shouldn't come to a point, but should span the entire distance of the end, covering your in-folds as much as possible. Staple in the center, and work out as much as possible.

A view of the end-folds.

That's all she wrote! It's fairly easy once you get the hang of it. The upholstery portion itself took only 20 minutes start to finish, whereas the removal of the staples took a few hours. My 2nd ottoman is better than my first, but that's to be expected.


We're using one as seating in the living room, and one as an extra seat in our dining room for company... that is, if the cat ever lets us have it back! 


Monday, October 26, 2015

Some Like It Hot (Springs)

Weddings, ahh, weddings. Raucous, joyous, gorgeous, and let me be blunt... really stressful occasions. Our wedding day was perfect. Although there are always hiccups, I would change nothing. Seeing such a lovely party come together was so very satisfying. Not to mention, to set the whole thing off, I got to marry my best friend! What could be cooler?  Although afterward I've been greeted with compliments of, "you should stop what you're doing right now and become a wedding planner," I've got some bad news-- as fun as it all was, I'm never gonna get married again! Talk about stress!

"And on the 8th day of wedding week, God created Honeymoons."

To celebrate/decompress from our wedding, Alan and I took a short Mini-Moon to Hot Springs, Arkansas. 

Stained Glass from the Fordyce Bathhouse, now Hot Springs National Park Welcome Center

Although three days seems hardly enough, let's be honest-- the wine world never stops (and honestly, the Army doesn't give a damn about your personal time anyway), so that's all the time we had. Three days was glorious, but four days would have been truly sublime.

Accommodations
After dogged market research (leisurely review-reading while coffee sipping) we settled on the 1890 Williams House Bed and Breakfast. It's a delightful turn-of-the-century manse just a short half-mile from Downtown Hot Springs proper. 

The Williams Suite

Palatial suites with in-room jacuzzis and breakfast in bed sounded just like what we needed. Plus, I always fancy a place with complimentary robes and 1,000 count sheets. Breakfast was killer, the water was hot (of course), and the space was just perfect. We'll definitely be back.

Food and Drink
Although not as densely gastronomic as some other areas of Arkansas, Hot Springs offered us all the options we needed for our three-day vacation. As mentioned before, B&Bs are the way to go, so breakfast is a given. If staying elsewhere or coming in for the day, check out The Pancake Shop in downtown. 

Seeking a delicious lunch or midday snack? Don't miss Rolando's Nuevo Latino Cuisine. The have an upper-level patio that frequently features live music, and always has a secluded mountainside atmosphere. We loved the quesadillas, fresh house-made Guacamole, and the Queso Flamado which is set ablaze by a nice dousing of Bacardi 151. Also, the Bloody Marias are not to be missed!

Rolando's Patio

The best dinner we enjoyed in town was courtesy of Superior Bathhouse. As can be imagined, Superior is a turn-of-the-century Bathhouse turned brewery that offers a fantastic food menu and house-made gelato. Our favorites were the Giant Bavarian Pretzel and the Boursin and Tomato Pesto stack. Our server mentioned the tomatoes were a local creation, and I'd do some dastardly things to secure a jar of them, they were that good.


Hungry, hungry Alan wants to go in Superior Bathhouse
And the beer? Oh man, is that beer delicious! Superior is the only brewery on federal property, and is the only brewery to brew beer with thermal water straight from the hot springs. It's some of the most flavorful and softest beer I've ever had. Their current selection of German options for Oktoberfest shows remarkable talent of the brewers, and was dazzling with the food. 


Relaxation and Rejuvination
As their well-branded promotional materials will inform you, Arkansas is also called, "The Natural State," and Hot Springs lies squarely on the cusp of the Ozark Mountains in Ouachita National Forest. The area offers sublime hiking and camping, as well as boating and kayaking. The Sunday of our departure from Arkansas, we took advantage of a nicely maintained 8ish mile out-and-back hiking and biking trail called the Charlton Trail that follows the Walnut Creek. 


During the hike, you'll summit two decent-sized hills that offer spectacular views of the surrounding countryside. During October, the weather is phenomenal, and the trees are changing color, and the wildlife can be spotted during early morning and twilight. Did I mention we didn't get bitten by even one bug?! Too good to be true. 


PROTIP: Start from the lake side of the trail, as the entrance to the wooded side is blocked as of the publishing of this blog post. 


Lake Ouachita is beautiful and has a lovely beach of worn slate. Channel your inner Norman Rockwell and get to work practicing your rock-skipping game. Winner of the most consecutive skips gets a free beer!

And now for the crown jewel of our adventure-- the Quapaw Baths and Spa. Hot Springs isn't called the Spa City for nothing, and we aimed to find out on Saturday morning.


Quapaw is one of two active bathhouses on Bathhouse Row, and still maintains a historic feel. Built in 1922, it is one of the newer bathhouses, but went into disuse officially in 1984. After determined rehabilitation efforts from the National Park Service and local businesspeople, the building was brought back to new unprecedented glory, and opened as a modern bathhouse and spa in 2008. 


The baths encompass the main floor of the building, and spa services are offered on the 2nd and basement levels. Since the building sits atop a natural hot spring reservoir,  the spa floor in the basement naturally radiates warmth. 

We made our reservations two weeks in advance and signed up for a couple's private bath followed by a his and hers massage. Alan selected the Sportsman deep tissue with hot stone alignment, and I got a Swedish massage with facial. The bath was conducted in the upper level of the building amid the original tile and marble. 

Be prepared to be warm, pampered, and well-hydrated! The staff is on a mission to fill you with their magic elixir-- Hot Springs Water-- during your entire stay. 

The massages were conducted in a thoroughly modern room in the basement. Our masseuses, Liz and Marcella, were miracle workers. Alan notoriously suffers from the early stages of frozen shoulder, or something similar, and Marcella set about the task of applying therapeutic massage. At the end of the hour-long massage, Alan professed how he had never before felt so relaxed and how the tension was melting away. It no longer hurt him to move his shoulders, though there was residual soreness as was expected. My massage was the perfect pressure, thorough, and relaxing. I received attention on all tension spots-- my feet, my hands, and even my scalp! Since starting my sales job, I spend a long time in the car, and have developed sciatic nerve pain in my right leg, but was soon gone after the great massage. After the pristine treatment, we lounged and sipped thermal water in the reception area of the spa, slowly sinking back to reality.


As we stepped away from the bathhouse and into the cool morning air of Downtown Hot Springs, I couldn't help but reflect on the mythical properties of the baths and of the town itself. We really and truly felt lighter than air, rejuvenated, and refreshed. Alan had received physical pain relief like he hadn't experienced since before he joined the Army, and I felt hydrated, relaxed, and free from sciatic nerve pain. We were now fresh-bathed believers, and vowed to pursue the path of therapeutic massage and nice warm baths from now on, because not only are the results incredible, the process is some of the most enjoyable time you can spend!

Thursday, October 22, 2015

Roux the Day

As I spend my afternoons crossing my fingers (and toes) for a real, substantial cold front to roll through Louisiana, I've been dusting off my Dutch Oven and my roux spoon to craft the first great gumbo of the season. Now, look... we ALL know that someone's MawMaw or somebody's cousin RayRay creates the best gumbo EVER and that every other one is sacrilege. I've heard it, so I'm not even going to attempt to slay that Southern Dragon today. What we're here to talk about is mechanics. The literal nitty and the gritty of making different types of roux.

If you find yourself asking the question, "What the heck is a roux?" well, Sugar, you've found the right blog post. Roux is a fancy French term that is a mixture of fat and flour that is slowly cooked, then added to stews and sauces as a thickener and flavor enhancer. It's the life-blood of many a Southern or French dish, and it comes in many colors and consistencies that nearly correspond to preferences someone might overhear at your local Beauty Parlor. Things like thick, blonde roux... or chocolate-brown roux. The lighter the roux, the lighter the flavor.

What you'll need:

portioned for a 5-quart gumbo or stew


4 tbsp of your preferred clarified animal fat.
This is something like bacon fat, duck fat, or clarified butter. Duck fat is my choice, as it imparts great subtle flavor and has a high smoke-point. If you decide to go the route of butter, make ABSOLUTELY sure it is clarified butter, but even still, you're likely to still get a bit of scorching. If you detest the idea of animal fat altogether, I'd suggest a high smoke-point oil such as canola or peanut.

4-5 tbsp of all purpose flour (sifted)
This flour is what will actually be cooking in the fat, and you'll do yourself a favor if you get a finely ground style like White Lily or even Wondra. Be sure to pre-sift your flour to remove any clumps that may have appeared

Wooden flat-bottomed spoon, silicone spatula
What you need as your stirring implement is something with a large surface area in contact with your pot. If you are using an enamel pot, be sure to get an implement that will not scratch your enamel, as you'll be doing quite a bit of stirring.

ON STANDBY: have your diced vegetables that will be used for your stew, or if making a sauce, your liquid.
For gumbo, we often use diced celery, onion, and green bell pepper. If making a roux for another French dish, you may have onion, celery, and carrot. For sauces, you might have beef broth, chicken broth, or possibly cream for a blond roux. Have this within arm's reach once you start cooking this roux.

Method:

Last warning! Once you start cooking your roux, you will NOT stop stirring, so stretch those triceps and get ready to work!

Turn the heat on your pot on medium. Nothing hot, nothing too low. Add your fat, and make sure it's completely dissolved before adding the flour. Add your flour, making absolutely sure to stir and incorporate all the flour into the fat. You want your flour/fat mixture (now, officially a baby-Roux) to be the texture of quicksand. For those unfamiliar, you want almost like a thin paste here. Think wood glue, maybe just a tad thicker. As the mixture warms, your roux will begin to slowly bubble.

Now start stirring that bad-boy.


As your mixture cooks, it will slowly go from light tan to darker brown. I like to stir in a zig-zag pattern and around the edge of the pot to make sure I move all of the mixture around to the hottest and coolest places on the pot. Work that wrist!

For lighter sauces and stews, you might stop when the roux approaches the color shown in the above picture. It's just enough to cook the raw flour taste out of the roux and to incorporate some of the fat. If you're going for a rich dark gumbo, you want the roux to go all the way to milk-chocolate brown color.

BEWARE-- once roux starts to head into the brown color-wheel, your time is of the essence. It will seem like FOREVER before the roux starts to assume any color, and when it takes off, let me tell you, it takes off and can burn quicker than a New Orleans minute.


The above picture is more caramel than chocolate brown, but that's only because you have exactly half a second at the right color to stop the cooking! (Yes, that is a chip in my enamel...)

STOP!!! (or how to stop a cooking roux at the right color)
When you're just about done reaching your desired color, remember that handy bowl of diced vegetables we have stashed nearby, or even that liquid for your sauce. If using the vegetables, dump those bad boys straight in your roux and STIR STIR STIR to coat them! The roux will help cook your vegetables and stop the roux cooking all at once (and you can't forget how delicious it smells).


If making a sauce, slowly add your liquid. Keep in mind, the mixture will boil violently at first, and then dissipate. Make sure you're careful not to let it boil over! Beware when adding cream. It can scorch if you're not careful, so lower the temperature a few notches.

If you want to reserve your roux for later (unincorporated in another stew or sauce), you're going to have to practice at stopping right before your preferred color is reached, taking the pot off the burner completely, or dunking your pot in an ice bath. I just prefer to make a roux as part of my preparation for a meal instead! Prepared roux can be refrigerated for up to one month.


Monday, August 17, 2015

Relics of a Time Gone By (part 1)

This past month or so, Alan and I have been itching for a mini-vacation. We love a decent winding drive to catch up on podcasts (and each other), a chance to get away, and exploring new places.

A few months ago, on the way back from visiting his folks in Kentucky, we passed briefly through Vicksburg and Northeast Louisiana. It surprised us both how much we realized there was deep history here, but how little credence we'd given the area before-- especially when it comes to vacation destinations.

On Saturday morning, we set off on a leisurely and Community Coffee-fueled drive toward Jonesville-Ferriday, intent to visit Louisiana's only UNSECO World Heritage site (and only the 22nd in the U.S.)-- Poverty Point Earthworks. Once a sacred spot to the Native Louisiana peoples around 2,000-1,000 BC, it is one of the oldest cultural points still in existence in North America.


The mound-building of Native Americans has spawned various logical and superstitious schools of thought; but these ancient mounds provoke a particularly enigmatic idea-- their entire purpose is decidedly unknown, but most likely ritualistic or religious. The design of the mounds themselves sparks the imagination-- a sort of proto-crop circle, many amateurs and professionals have hypothesized their significance. 


What we do know about the site is based on the things we have found, and also what we have not found at the site-- other mounds usually suggest burial, but no tombs or bodies are found here. There are some older portions of the site that suggest that it was significant before it became so large, and that it most likely was a permanently-habited site for around 600 years, with much trade occurring here over that time. What is known is that the design is man-made, and took a group of people a lot of time and effort to put together. Our personal speculation? The design is that of a Barred Owl that is populous in the area, and considered sacred to these people. We observed one in flight during our meager stay of two hours!


As happens with nearly everywhere, the place eventually fell out of favor-- whether due to the Mississippi river changing course and flooding, the loss of wild game, disease, or just due to the younger generation's slowly shrinking sense of reverence for the ways of their forefathers (we've all been there...). And then, as also happens, a new group of people found the place desirable again, and history was laid on top of other history like layers of silt. One of the older mounds shows great wagon wheel grooves worn into the middle as settlers from the 1700-1800's followed the small tributary bayou out west. After this, other settlers made permanent homestead here, and later the plantation for which the site is named.


As you guide yourself along the lovely (and, in mid-August, steamy) three mile hike, you're greeted with tracts of open grassland, lovely bayou views, lush forest trails, and handfuls of curious critters to blend the natural and the historical elements of the site seamlessly together.


So what did we learn; what did we come away with? What's left at the end of such a lovely hike and tour? Definitely a profound sense of wonder and hundreds of questions, for which the very deeply explored scientific answers are, "We really don't know much, but we do know this stuff is special."


As we got our sweaty selves rehydrated and off to Vicksburg to explore our more modern Civil War history, it hit us how the passage of time can change what we think we know about the past and, honestly, is Poverty Point really just an ancient society's own Battle of Vicksburg National War Memorial that time and consciousness forgot? Instead of arrowheads, we have bullets? A crossroads of many peoples, or were they the armies of peoples, or peoples just coming to remember the past? Because honestly, after seeing both places, they can appear eerily similar, just a few miles and millennia apart. 

Monday, June 8, 2015

Shine On, Baby!

As is most likely common knowledge, us southern gals have a lot of sterling silver on hand. If there's a stainless steel option, I guarantee you there is a sterling silver equivalent, and some southern bride has that on her wedding registry. Our mamas and grandmamas had tons of the stuff, so of course we do also.

I'm not shy about using silver in every day life. If you have it, then use it. Dark and dusty silver is sad silver.

Now, I'm just some random girl on the internet, but listen to me when I tell you about a product every Silver-loving Lady needs to have on hand.

Wright's Silver Cream Polish

Now, I don't know about you or your neck of the woods, but look hard enough, and you'll find this stuff is available at the grocery, the drug store, and pretty much any supermarket in the south. It's that canonical. It may seem pricey, but the shine is worth it.

Before

I have a set of silver goblets with engraved initials on them, and for a recent dinner party, I polished those bad boys up. Splash a bit of water on the enclosed applicator sponge, work a dab over an area, and you'll be surprised how easily the tarnish comes off. Works equally well on jewelry, utensils, serving pieces, christmas ornaments. ANYTHING silver!

After

The shine stays very well, but a hint for all silver-lovers out there... oxygen is the enemy of shininess. If you've got a bunch of silver to store, get some clean/unused plastic grocery bags, wrap the silver in cloth or paper towels to wick away any moisture, and enclose tightly as you can in the grocery bags to eliminate air. Tie with a rubber band or twist tie. You don't want the plastic directly on the silver, but it will help in eliminating air from the swaddled pieces.

Getting a Bit "Choked" Up

Summer always reminds me of one of my favorite seasonal foods-- the ever enigmatic artichoke. Done the wrong way, and this interesting flower can drive you crazy, but done correctly it will knock your socks off every time!

Long Stemmed Artichokes are my favorite, as the center of the stem itself is quite edible. I'm going to show you the basics of artichoke preparation, and then some of the great flavorful options for your Chokes.


Step 1 - Cleaning the Artichoke

Using some kitchen shears, remove the lower leaves on the stem, and snip off the spiky tops of the leaves. Using your hands, create space in the bloom of the flower, allowing you space to clean it further.


Step 2 - Removing the Flower

Using a spoon (a grapefruit spoon is ideal), carve out the center part of the flower, leaving 5-6 sets of leaves on the outside. You'll notice inside the flower there are some tender, soft, fibrous parts. Treat this section like you would carving a pumpkin and removing it's guts. Scrape that spoon along the base of the flower to get out all the fibrous, small pieces of flower. 


Step 3 - To The Sauna!

Continue to "fluff out" the blossom to allow space between the concentric rings of petals. This is going to help you to cook the flower faster. While you're doing this, sprinkle a bit of salt and pepper inside the layers.

Using a steam basket and a large pot with 3 inches of water in the base (not touching the flowers), place the blooms stem-side up over the steam. Seal, and allow to steam for 20-25 minutes, checking for tenderness. After 25 minutes, the blooms should look less radiant green, and the leaves should easily come off with the tiniest tug. 

**Pro-Tip** We like to let our blooms rest for a day or two in the fridge before steaming. This allows the pollens in the flower at the base to oxidize, creating a very rich, unctuous, floral character. Yes, it will turn the inside of the flower black (same oxidation at work) but we think the flavor is delicious. 

Step 4 - Finishing up

At this point, you're good to eat these bad boys, but we can always spice it up a bit. How to eat-- The meat is at the base of each leaf. Put the leaf between your teeth and pull the leaf to scrape the meat off. NOTE-- after all the petals have been pulled off, that base is some of the most delicious veggie meat in the world. You can also peel the stem and eat that part as well. 

Balsamic-Butter Dipping Sauce
4tbs nice butter (Kerrygold Preferred) 
1tsp nice Balsamic Vinegar
1tsp minced garlic
1 slice lemon

Melt butter in sauce pan, but not too hot so the fat doesn't separate. Add garlic, simmer for 2 minutes, take off heat, add Balsamic Vinegar and juice from lemon. Whisk together, adding a bit of fresh cracked pepper to taste

Stuffed Mushroom Artichokes
3 long-stemmed Artichokes
4 cloves garlic (minced)
1 pint Baby Portobella Mushrooms
1cup Shredded Parmesan Cheese
1/2 cup Italian-seasoned breadcrumbs
3 tbsp Olive Oil
2tbsp fresh minced basil

Clean, prepare, and steam artichokes as shown above. Cool. Preheat oven to 375 degrees. While artichokes are cooling, chop finely Portobella mushrooms including stems. If you have a food processor, this is going to be your best friend. Mix together garlic, basil minced Portobellas, parmesan, breadcrumbs and olive oil. This can also be done in a food processor.

Once artichokes are cool, slice down the middle from stem to tip, leaving an open cavity on each side. Lay artichoke halves cavity-side up on a large foil-lined baking sheet. Fill cavities with filling mixture, dusting with a bit of extra breadcrumb on top. Bake for 15-20 minutes until filling is warmed through and a bit golden on top.

There are tons of great recipes for stuffed artichokes out there. Some incorporate seafood, bacon, sausage, you name it! Once you master the clean-n-steam technique, let your taste buds be your guide!