Monday, April 11, 2016

Cilantro + Mint Margaritas

We recently bought this cheapo grill that we have been using all spring and plan to continue abusing all the way into the summer. This Saturday, we made some delicious Fajita Steak Kabobs to throw on it, and while we were waiting for those to sizzle, we mixed up some delicious Cilantro + Mint Margaritas. Enjoy!


Cilantro + Mint Margarita


6-8 cilantro leaves (torn)
6-8 mint leaves (torn)
1/4oz Agave Nectar
3/4oz Cointreau
1 1/2oz decent Gold tequila
Juice of one medium lime (approximately 2oz)

In a shaker can, add all ingredients and stir with barspoon to incorporate agave nectar. Add ice, seal, and shake vigorously until frothy. Strain into a salt-rimmed glass.

Monday, March 21, 2016

Crawfish Monica

Ahh spring. For Louisiana folks this translates to the perfect time for backyard crawfish boils.


I won't be long-winded about the boils, but I want to let you in on one of the best applications for those delicious leftover crawfish tails. If your friends and family are as kind as mine are, they'll hang out and help you peel the leftovers.


When life gives you crawfish, you make Crawfish Monica. The recipe has its roots in New Orleans Jazz and Heritage Fest, where it is the "official" food of the festers.


Crawfish Monica

Ingredients

  • 6 tbsp unsalted butter
  • 2 tbps olive oil
  • 1 medium onion, diced
  • 3 garlic cloves, minced
  • 1/2 cup dry white wine
  • 1 tbsp cajun spice (Slap Ya Mama is what I use, but substitute whatever you have around)
  • 2 cups heavy cream
  • juice of one medium lemon
  • 1/2 cup parsley, minced
  • 1/2 cup green onion, chopped
  • 1 lb peeled cooked crawfish tails
  • 1.5 cups grated parmesan cheese
  • 1 pound cooked strained pasta (preferably rotini)

Method

In salted water, cook pasta and keep warm while set aside. In a large saute pan on medium heat, melt butter and olive oil. Add onion and garlic, and lightly salt and pepper. Saute until nearly translucent, then add white wine and cajun spice of your choice. Cook until nearly completely evaporated; approximately 5 minutes. Add cream and lemon juice, and stir to combine. Cook for 3 more minutes, or until the liquid has reduced by about 1/3. Add parsley, green onion, and crawfish. Stir and cook for 5 minutes or until crawfish are warmed through. Lower temp to low, then add 1 cup parmesan cheese. Stir until melted. Taste for flavor. If not enough, add more cajun spice or lemon juice. Combine sauce and pasta over low heat, and combine. Add additional 1/2 cup cheese and stir to melt. 

Voila! Crawfish Monica. Best paired with Traditional Jazz and Abita Strawberry beer. 

Saturday, March 5, 2016

DIY Bistro-lighting Tips and Tricks

I always love outdoor lights, and have been thinking long and hard about how to incorporate them into the outdoor space at our house. I'd like to spend the great spring, summer, and fall evenings al fresco with some friends, but we didn't know exactly how or where. Then it dawned on me-- we have the perfect driveway for this project!

Since everyone's space varies, I'll just show you a handful of tools and tricks to help you get the desired effect with little cost and big payoff-- all in an afternoon and for under $150!

  • Use as much of your natural environment as you can! You can add anchor points to fences, trees, your house, etc. , just make sure all surfaces are protected from weather. If they move in wind, make sure you have enough slack in your line and on your anchor points.
  • Get commercial-grade outdoor lights like these suspended base ones from 1000Bulbs based in Texas. They are industrial, built for outdoors, and the suspended base helps take load away from the wire string itself. The 1000Bulbs website also has great options for the bulbs themselves, of course. 
  • If affixing anchor points to trees, use plastic-coated wire and soft tubing to not damage your plants. We bought a garden soaker hose to cut into lengths, and it was really cheap. 

  • Create your own wire loops with cable ferrules that can be crimped around the ends. You can use these to attach around trees, fence posts, etc, without damaging the surfaces. They can be unclipped very easily if you need to remove or replace your lights. These loops with tubing in between is what we used to secure the lights to our trees.
  • Quick Links or even S-Clips create clean attachment to your anchor points without stressing either the anchor or your lighted wire. Make sure the links you purchase can fit around your wire or eyelets you may use!
  • If using an outdoor outlet or electrical extension, protect the light outlet from weather by covering thoroughly in waterproof electrical tape or encapsulating the join with an all-weather extension cover made for Christmas lights. It's imperative to keep all electrical terminals away from the elements, even when unplugged to resist corrosion.
  • Lastly, be sure to measure, measure, measure again before cutting, installing any anchor points, or even buying the light string. Use trigonometry to calculate how much lighted footage you'll need, inclusive of the swagging in between points! 


Tudor Rose Cocktail

I've been mildly obsessed with floral things and spring in general. I've also been pondering the idea of our own little hen-house in the yard, but before I'm granted clearance, I have to find viable uses for the number of eggs we'd have on hand! Introducing the Tudor Rose cocktail.


Tudor Rose Cocktail

1.5oz Rose-infused vodka (recipe follows)
1/2oz Campari
1/2oz St. Germain Liqueur
1/2oz good Grenadine
1 fresh egg white

Add ice and water to a coupe glass to chill. In a Boston shaker can, combine all ingredients except egg white. Add ice, and stir vigorously to cool. Strain into shaker pint, and discard ice. In the cool shaker can, add egg white, and agitate with barspoon to break down major proteins and begin the whipping process. DO NOT ADD ICE, we are conducting a reverse dry-shake! Add remaining drink ingredients, seal, and shake vigorously until drink is frothy. Pour into chilled cocktail coupe and serve immediately. 

The roses are from my neighbors' house.

Rose-Infused Vodka

1/4cup fresh fragrant rose petals
1 cup decent vodka

In a mason jar, bruise petals with muddler to express oils, add vodka, and stir. Seal, and let to steep in a cool dark place for 2 days, agitating occasionally. Strain petals before after 2 days, as they will begin to become tannic. 

Friday, February 19, 2016

Low-Country Shrimp Boil

As soon as the crickets and cicadas start singing, it's bound to be springtime. Today was sublimely gorgeous, and to celebrate, I toted home 3 pounds of massive shrimp caught just this morning from New Orleans for a good old shrimp boil. Here's how to do one yourself.


This recipe is for two hungry people, or a great appetizer for 4. We will be cooking the below recipe in two batches to make enough for a whole meal.

Ingredients

  • 3lbs fresh (not frozen) head-on, shell-on shrimp. If you can't get this, then substitute the peeled variety, but not cooked or frozen if possible.
  • 6 small lemons
  • 1lb small red potatoes or even fingerling potatoes will do
  • 8-10 cloves garlic
  • 2 medium onions
  • 3 bay leaves
  • 6 small "nibblers" half-size ears of corn
  • 1lb sausage, dealer's choice
  • Zatarain's Crab Boil "In Bag" 3oz (1 bag)
  • 4oz Zatarain's liquid Shrimp & Crab Boil Concentrate


Method

Rinse shrimp with cool water and remove any broken legs or antennae. Divide into two servings, then set aside. Quarter the lemons, halve the potatoes, and rough chop the onion. Cut sausage into 2 inch long pieces. Peel 8-10 garlic cloves. Over a medium-hot flame, boil 1.5 gallons of water with Zatarain's Crab Boil, Zatarain's Concentrate, and bay leaves. Once to a boil, add half the prepared lemons, potatoes, onion, sausage, corn, and garlic. Allow to boil for approximately 15 minutes until potatoes are just soft. Add one half of the whole shrimp, and turn heat down to medium. Cook for 3-4 minutes, depending on the size of your shrimp (larger take longer). Turn off heat and leave to steep for 2 more minutes. Using a strainer or colander, remove all contents excepting bay leaves, lemons, and Zatarain's bag. Return liquid to a boil, and add second batch of lemons, potatoes, onion, sausage, corn, and garlic. Repeat the boiling process, adding shrimp after 15 minutes and then turning off heat after shrimp are cooked for a few minutes, then strain.

Peel and eat shrimp and accoutrement once cool to the touch!

TIP: If you have too many potatoes leftover a great idea is to smash them with sour cream into a savory mashed potato side for later!


Bonus Recipe: Alan's Creamy Cocktail Sauce

  • 1/2 cup Ketchup
  • 1/8 cup Mayonnaise, Miracle Whip, or Salad Cream
  • 1tbsp lemon juice
  • 2tbsp Worcestershire sauce
  • 2tbsp Prepared Horseradish
  • 1tsp onion powder
  • 1tsp ground pepper


Stir to combine all ingredients, then serve.


Thursday, February 11, 2016

Mid-Winter Beef and Barley Stew

These days, I can't ever tell from one day to the next if one evening will be freezing, or fairly balmy. Tonight, however, is blustery and chilly and calls for a cozy, hearty dish.


Ingredients

  • 1 large white onion
  • 2-3 carrots
  • 5-6 ribs celery
  • 2 cloves garlic
  • 2 bay leaves
  • 1lb stew beef cubed
  • 4-5 tablespoons olive oil
  • 6 cups beef broth
  • 1.5 cups dry red wine
  • 1 cup flour
  • 1 cup pearled barley
  • salt
  • pepper
  • 4 tablespoons Worcestershire sauce
  • 4 tablespoons soy sauce

Method

(makes 4 servings, takes 3 hours)

To make relatively similar size pieces, roughly dice large onion; peel and coarsely chop carrots; chop celery. Mince garlic.

Rinse then dry cubed stew meat. In a large bowl, combine flour, 1tsp salt and 1tsp pepper. Stir to combine. Working in batches, coat cubed stew meat in flour mixture. 

In a large cast iron pot or dutch oven, heat olive oil on medium heat. When fragrant, work in batches to brown cubed meat on all sides. Avoid overcrowding. Remove from oil and set aside. 

Once all meat is browned, add all diced veggies (excepting garlic) to oil, adding additional oil if needed to get vegetables coated. Stir to coat, and add dashes of salt and pepper. Add garlic after one minute. Stir to continue cooking, or until onions are turning slightly translucent-- about 4-5 minutes. 

Add browned beef mixture to the pot, and add 1 cup dry red wine and enough beef broth to cover the vegetable and beef mixture, approximately 3 cups. Add 1 teaspoon of each salt and pepper and half of the Worcestershire sauce and soy sauces (2 tablespoons of each). Stir to combine. Bring mixture to a boil, and turn heat down to low. Simmer uncovered for 15-20 minutes, or until liquid mixture has reduced in the pot by about a third. 

Add 1 cup beef broth and remaining 1/2 cup dry red wine. Add additional tablespoons of salt and pepper, as well as remaining 2 tablespoons of Worcestershire and Soy sauces. Stir to combine, and bring up to boil, then lower heat to simmer. Simmer covered for an additional 1.5 hours, stirring every half hour to prevent sticking. 

Rinse 1 cup pearled barley in cool water and drain. Add to stew and add remaining cup beef broth. Stir, cover, and simmer for 45 minutes until barley is cooked through. Remove from heat and allow to cool slightly before serving.

Bon Appetit!

Saturday, January 23, 2016

The Master Piece

Throughout the clean-out stages of our home renovation, we have been storing and sifting through our things in the biggest-offending room of them all: the master bedroom.

This room is one of three rooms in the house with wallpaper, and the only one with carpet. As such, the propensity of the room to collect dirt and grime has been the greatest. We're having to tackle a few major issues in this room-- damage to sheet rock and surfaces due to chain-smoking and cat urine. There also exist the regular '70s Reno pitfalls such as crunchy popcorn ceilings and ancient wallpaper glue as well as the ever-disintegrating shag carpet.

The room in its original state

The room after completion


Needless to say, this room was intimidating for me to start on, but I vowed to have it ready for Christmas!

Detail of wallpaper (1x2 feet)
The obvious first step was to clean the room itself out. It had been our "distillate" room of sorts when cleaning out the stuff from other rooms, meaning as tough decisions arose, or we came across things we were unsure whether we should keep, they ended up in this room. That made the process of cleaning this room out a very difficult one.


The next steps were:

  1. Removing and assessing usability of crown moulding
  2. Removing, cleaning, restoring ceiling fan
  3. Removing the wallpaper
  4. Removing the popcorn ceiling
  5. Patching and caulking any holes, cracks, or flaws
  6. Sanding all surfaces
  7. Cleaning and vacuuming all surfaces
  8. Priming, sanding, and painting all surfaces
  9. Painting, cutting, installing new crown moulding
  10. Removing carpet, assessing the floor underneath
  11. Cinderella-style scrubbing of the floor followed by sanding, then more Cinderella-style scrubbing.
  12. Cleaning, staining, sealing the floor
  13. CLOSETS!

We decided to leave the disgusting goldenrod carpet in place as a perfectly-fitted drop-cloth, and we'll tossed it when the paint was done, waiting until the end to assess the condition of the floor underneath.

The wallpaper--

For starters, we removed any nails or screws in the wall itself, taking as much care as possible to not destroy the sheet rock/drywall. We then removed the crown moulding. It was splitting, so we won't be using it again.

Our best friends were a flat paint trim guard  and the Paper Tiger Wallpaper Scoring Tool. We also devised a solution of 2oz liquid laundry detergent and 16oz water in a spray bottle to help loosen the glue (as well as improve the smell in the room).


The method:
Score a 5-foot section of wall, douse completely with the laundry detergent/water solution, and allow to sit for 5 minutes. Continue to score and soak again as you wish. After the 5 minutes have elapsed, use your putty knife or your paint guard to begin scraping big chunks of paper off. Be sure not to gouge your drywall, but also be sure to remove as much glue as you can. Don't kill yourself, as you'll need to go back over the wall with a sander in any case.

The Ceiling--
Get ready for serious fallout of the nuclear variety, but also prepare to get some sweet, sweet, triceps at the end of this deal! The tools for the popcorn ceiling removal process are remarkably similar to those used in the wallpaper removal process with one serious addition-- the Shop Vac. The Shop Vac pulled double duty keeping as much dust out of the air as possible and removing some larger chunks of popcorn.

I'm a cruel, cruel wife.
 The first step was to use the Shop Vac directly on the bare ceiling to remove as many chunky bits of popcorn as possible. These bits absorb our laundry detergent/water mixture and keep it from getting to work on the glue. After vacuuming, spray a 5x5 foot section of ceiling with our magical mixture, and allow to steep for 5 minutes. Proceed to get showered in dust as you scrape the ceiling away. Beware again of gouging, and of scraping unevenly on the floated patches if you have them. You want to leave the ceiling as level as possible.

It's snowing inside!
Sealing, Caulking, Spackling--
Definitely took a bit longer than I was expecting. I had to clean, remove excess falling caulk, and make sure the surfaces were ready for adhesive. I used Dap 3.0 white window, door, and trim sealant for the windows, doors, and baseboards. I cut the tip of the applicator tube at an angle so that I could apply evenly, then ran my index finger over the joint to seal it off completely. We did this to all wooden trim that sat away from the drywall.

PAINTING!
Since the original wood trim in the room was coated in oil-based paint, we had to prime it with Kilz Oil-Based primer. Once primed thoroughly, latex paint can go directly on top of the primer and never will we need to return to that wretched oil-based paint! For the drywall and ceiling, we just went straight for Kilz2 Latex Primer.


I painted the wooden trim first, as I needed to thoroughly cover edges before painting the color on, and the color was easier to control. The white we used is what we used in the other parts of the house-- Sherwin Williams's HGTV Satin Finish in Roman Column. For the walls themselves, we used the same brand and finish of paint in Recycled Glass. We did two coats on each surface.


Details--
We also had to uninstall, clean, and reinstall the transom window and window hardware. We also had to reinstall the corresponding hardware for window locks and door rimlocks. Oh, and reinstall that 60-lb cast iron ceiling fan from the 1930's. It's an old hunter variety that if oiled, will run like a champ way past my lifetime.

The Floor--
Finally came the time to remove the carpet!! It was really gross, and I ended up cutting it into 4 large sections to roll up and dispose of in contractor bags. I also had fun using the pry-bar to remove the floor tack tracks along the wall's edges.

Sassy reno-cat

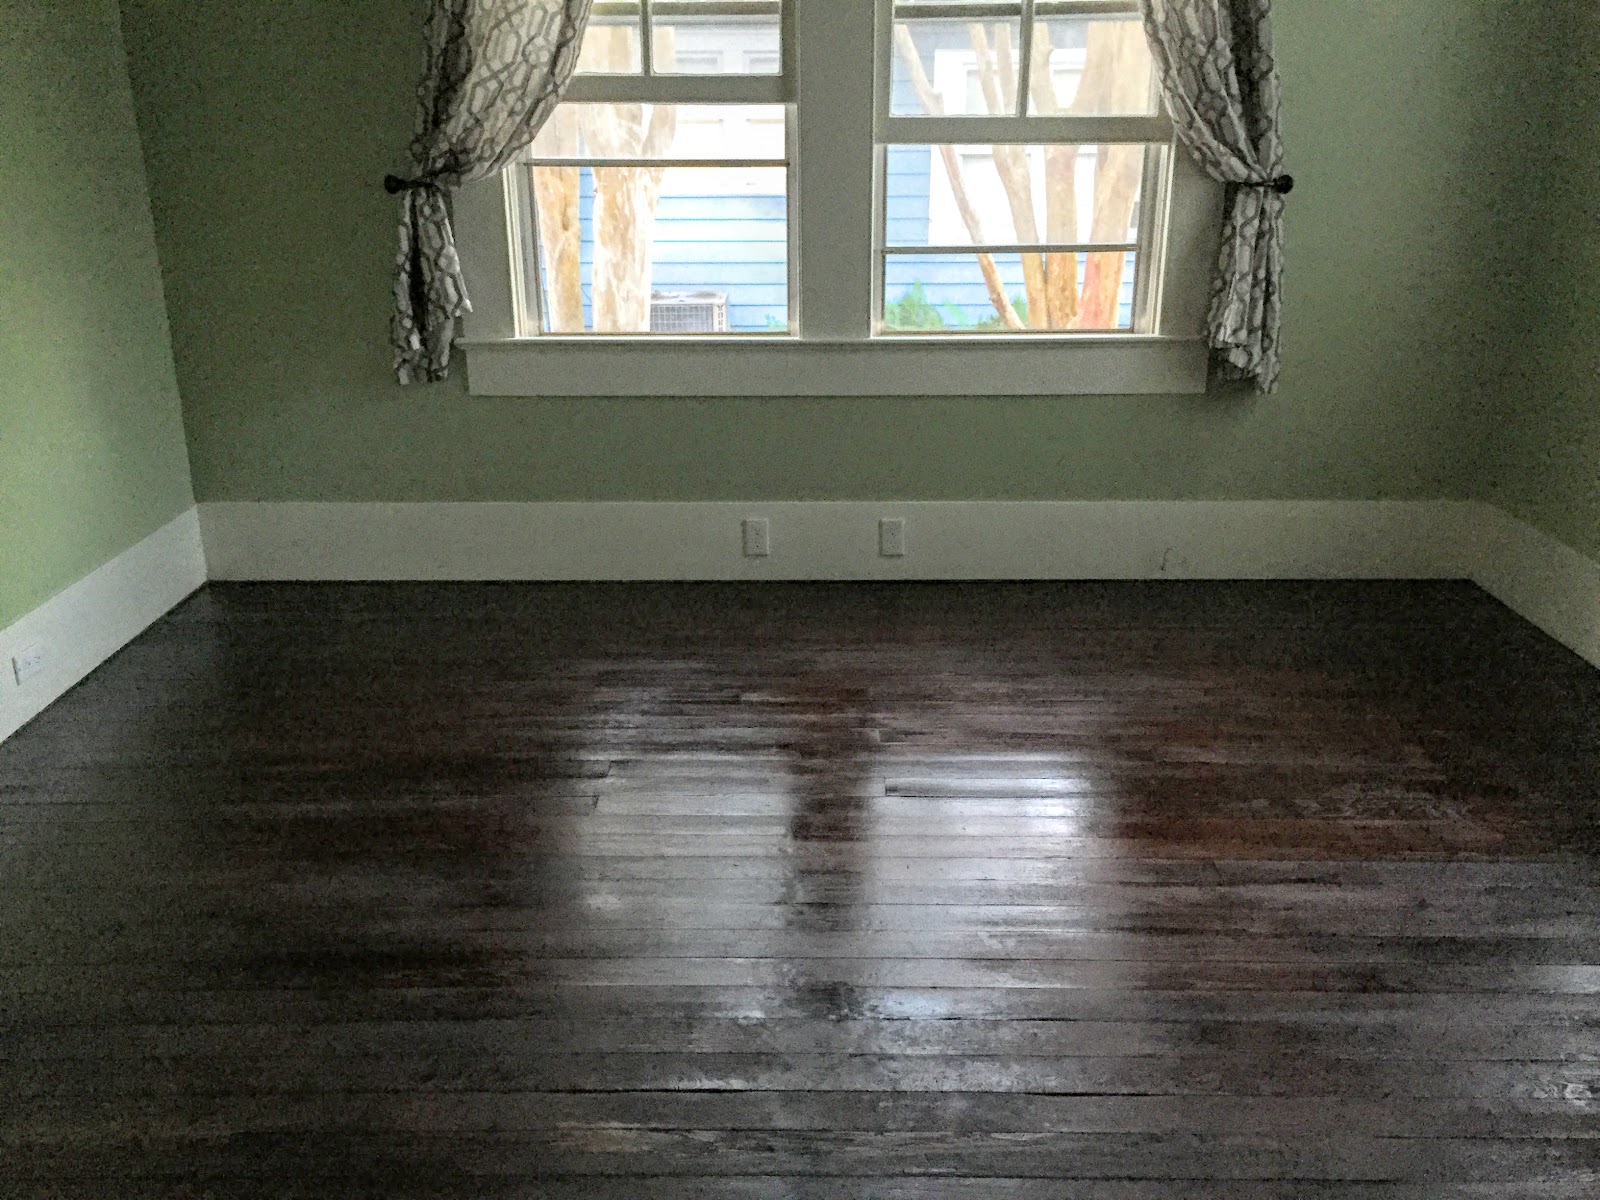
We were really hoping to get by without refinishing the floor, and so we gave it a thorough cleaning job, but it became evident that we had to take that on. The boards were splintering in spots, and there was just some gunk that would not come up. We sanded, sanded, and sanded, and then we cleaned, cleaned cleaned. Afterward we used Minwax High Performance putty to fill in the splintered parts and got ready for staining. As it dried, we also installed curtain rods, curtains, new electrical outlets and light switches.

The condition of the floor before cleaning

The following morning we cut, painted, and installed the new crown moulding. I did not get any pictures of that process, but let me tell you, it was incredibly frustrating and very, VERY educational. That was probably one of the toughest parts about this whole room renovation-- between cutting the exact angle on two planes, to getting the measurements pristinely correct (and having them still be wrong), the whole thing was painstaking. Also, newsflash... old houses's walls are NOT completely even and straight. That can cause some serious problems upon installing 16-foot sections of crown moulding. Tread carefully when taking on that project for the first time!

After a few bourbons and a few cat cuddles...

Our thoughts expressed after crown moudling
...we were ready to stain. We used Minwax Polyshades in Walnut, as we just wanted to richen and seal the current floor color. I would not recommend if you have untreated or bright wood and are looking for a dark stain. I would instead stain the wood itself before applying polyurethane. We applied it with cheap old natural bristle brushes that were 4" and worked in a team for two hours to make sure we got it on evenly.

Waiting for the floors to dry!

The next morning-- surveying the damage!
We had done it! The floor was a bit sticky the next morning, but after walking on it for a bit, the sheen died down. Technically, you are supposed to sand this layer, but just some gentle wear got it perfectly ready for us to install the bed, nightstands, and all the other things. Overstock.com's holiday sales were our best friend in that regard.


We did it!!! 

Our official dates from start to completion of this room were 10/31/2015 to 11/23/2015, not counting the closets finished on 1/16/16. That was a whole other ordeal, and the lesson learned there was, "1970's cheap parts and hasty, messy labor contractors are the enemies of today's renovation projects." 

Saturday, January 16, 2016

Come Fly With Me

Today Alan and I ventured to Inglewood Farm for their weekly Saturday market, and what did we discover but a bumper crop of gorgeously juicy Meyer lemons. Tonight before dinner as we were listening to some old Sinatra, we decided to fix something that reminded us of the slightly hazy winter sky and the fresh, floral flavor of that tantalizing citrus.

The Aviation Cocktail


Combine together in a shaker:

1.5oz Gin
1.5oz Fresh-squeezed lemon juice 
3/4oz Maraschino Liqueur
1/2oz Creme de Violette Liqueur

Add ice and shake vigorously. Strain into chilled coupe glass. Rim glass with a lemon twist. 

Saturday, January 9, 2016

New Year, New Orleans

A festive guide to a romantic New Years Eve in the Big Easy


To fill you in, Alan and I met when I was living in New Orleans. To keep it short, our love was hatched over Old Fashioned cocktails and raw oysters in some of the best little restaurants hidden in that town. This year, we decided we'd return to our "roots" for New Years Eve and explore the city that's changed so much in two short years, and check off some restaurants on my list of places to dine. Don't worry, we'll never quite reach the end of that list.

At Cochon in 2014

Rule #1
Avoid Bourbon Street (unless 70-year-olds chain smoking in crop tops is your thing)
Look, I do have love for Bourbon Street. I just wouldn't characterize it as charming or romantic. It's got it's own feel, and for this night, we left it out. Our key words were "intimate" and "delicious."

Rule #2
Find a decent place to stay
And for the love of the 'hood, avoid AirBNB unless you personally know the owner. AirBNB's model is phenomenal, but it's also ruining the great neighborhoods of New Orleans for everyone, even tourists. That's a whole other post, but do us a favor, and stay at a cute boutique hotel or BnB that pays taxes and has a business license, ok? Look toward the Marigny, Warehouse, Lower Garden, or French Quarter neighborhoods.

Rule #3
Don't drive!
Aside from obvious facts like drinking, parking is a nightmare, and you're likely to get stuck in some construction maze. How unromantic is road-rage? Do everyone a favor, and call an Uber or a taxi.


We were fortunate enough to have good friends that live in a loft in the warehouse district. They were out of town for the holidays, and allowed us to stay at their place. That saved us a ton of cash, and put us right at the start of our "dinner map" so to speak.

Stop 1 - 4:00pm: Martin Wine Cellar
On our way into town, we stopped at the Baronne Street location (though Metairie will also suffice) and picked up some great small-production vintage champagne to sip on while we spruced for the evening. Martin is one of very few retailers in the nation that direct import and retail incredible French, Spanish, and Italian wines. While here, do yourself a favor and pick up a few bottles.

Champagne Gaston Chiquet Special Club 2007

Stop 2 - 6:00pm: Sac-A-Lait
This was our first restaurant stop, literally 200 feet from the bed we were sleeping in. It's been around for nearly a year now, and it's specialties are esoteric south Louisiana country eats with a gourmet twist.


Our stand-out dishes and drinks:

The wines by the glass list was impressive and offered great choice and variety. I had the Gamay. Raw oysters are always delicious, but the house-made sauces really hit them home. The creamy horseradish was our favorite. The Alligator and Mirliton dish was incredible, and believe it or not, I think the Mirliton mash with Remoulade sauce was the star. I will be attempting to make that myself.

Stop 3 - 8:15pm: Angeline
Located in the old "Stella" property, this restaurant is away from the street and quite intimate. We requested to dine at the bar, which has a total of 5 seats. The service was impeccable, and the food was phenomenal. Some of the best we've had recently. We will definitely be back.


Our stand-out dishes and drinks:

This is really tough. Everything we had was dynamite. Old Fashioned - great, French 75 - great. But the best I think was the drink called the Last Aviator, which is a mix of the Last Word cocktail and an Aviation. Gin, Creme de Violette, Campari, honey, and lime are showcased. I am attempting to replicate this myself, but I've not succeeded in breaking the code. For food, the Georgia Clams and Wild Boar sausage was a knock-out, though if you have a salt sensitivity, don't do it. Definitely briny.

Stop 4 - 9:15pm: Cane and Table
This restaurant is described as European-colonial meets proto-Tiki. What I think is that it's definitely what Louisiana tasted like in the 1700's. Brainchild of cocktail wunderkind Nick Detrich, we've been here quite a few times and always return, though the brand of cocktails and food is not for everyone. Simple, heirloom cocktail recipes and classily antique new-world flavors are the mainstay.


Our stand-out dishes and drinks:

Drinks are the name of the game. The cocktail list here is nearly two pages. But for us, the best things were the Labat's Planter's Punch, a potent mix of 3 rums and lime (recipe from 1693) and the Bottled Silk, which is an enchanting concoction of Cava, fino Sherry, and Birch Snaps. The Crispy Suckling pig was sinful, with slow-roasted texture and juices that seeped into the rum-soaked bread that it rested on. Believe it or not, the Brussels Sprouts blew us away. A bit spicy, but perfectly crispy, this is exactly what tipsy Alan and Wallace wanted from Brussels Sprouts. 


Stop 5 - 10:30pm: Beachbum Berry's Latitude 29
To continue the proto-Tiki trend into a mod-50's Tiki moment, we finished up with this place. Equal parts New Orleans and Trader Vic's, it's a great place to end the night and a phenomenal vantage point for fireworks!


Our stand-out dishes and drinks:

Dumplings. Dumplings everywhere. Knock yourself out. The Dumpling Burger does not dissapoint. For drinks, we chose a communal option. Upscale parent to Bourbon Street's fishbowl cocktail, the one we chose was the Lapu Lapu, a 60's drink based on rum, lime, and juice. We finished up our drink just in time to step out the front door and catch the fireworks.

After settling up and sealing midnight with a kiss, we took an easy stroll back toward our abode for the night, not more than 3/4 a mile. It was quite a way to seal such a big year in 2015, and though we were unsure if we still "had it" to make it through 4 restaurants, we found out that not only are we still with it, we can do it with impeccable timing!

Courtesy Hotel Monteleone

Christmas Eve Champagne Punch

I'm sort of a Christmas junkie. I get my decorations up the week after Thanksgiving (hey, I'm no monster) and they don't come down until 12th Night at the earliest. We've been working long and hard on our house this past year, and to show off our latest achievement (a complete master bedroom renovation), we hosted a cozy Christmas Eve party. To put everyone in the holly, jolly spirit, we put together this Champagne Punch, which after crowd-sourcing reviews, was a big hit. Here's how to do it.


Christmas Eve Champagne Punch
2 cups Rosemary Simple Syrup (recipe below)
2 cups orange liqueur, preferably Grand Marnier
1tbsp Angostura bitters
1/4 cup lime juice
2.5 bottles (750mL) sparkling wine (choose something traditional method, such as Cava, Prosecco, or Cremant)

In a punch bowl, combine first 4 ingredients over ice. Pour on sparkling wine, combining gently so as not to release too much bubble. For the best ice to use, see the "ice wreath" note below. Cubes are NOT ideal.
The aftermath of our punch

Rosemary Simple Syrup
2 cups sugar
3 cups water
6 rosemary sprigs, coarsely chopped
Bring water to a simmer on the stove, and stir in sugar. Once dissolved, remove from heat and stir in the rosemary sprigs, bruising them a little as you stir. Let cool, then funnel into large mason jar or bottle with lid. Allow to steep at room temperature for two days, gently agitating a few times a day to reincorporate rosemary. Strain before serving.

Ice Wreath
As I mentioned before and will iterate again, ice cubes are NOT desirable as they melt very quickly, and therefore don't do much for cooling. Plus, they end up watering things down. Instead, try creating a fancy ice wreath for this festive holiday punch. In an attractive bundt pan, layer sliced limes and oranges. Fill 1/3 full with water, sprinkle in some cranberries and rosemary sprigs, and allow to set in the freezer for two hours or so. Once hardened, create another layer and freeze thoroughly. Allow to sit 5 minutes at room temperature before inverting over your punch bowl. The wreath should fall right out! As it melts, the fruit will begin to float around the bowl; continuing to flavor your punch!