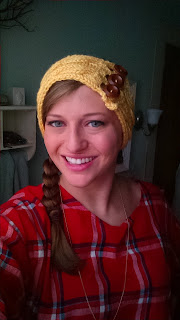
In addition, what's better than a stylish headband that you can make in an hour?!
Cable-Knit Headband Knitting Pattern
- Size 8 knitting needles
- 3 buttons (1 inch)
- Cable knit hook
- 1 skein yarn (4 weight) I used Vanna's Choice.
Cast on 24 stitches.
First row knit all, second row purl all. Repeat 3 more times until you have 8 rows on your needles.
Working pattern:
Row 9: K4, P6, K4, P6, K4
Row 10: P4, K6, P4, K6, P4
Row 11: K4, P6, K4, P6, K4
Row 12: P4, K6, P4, K6, P4
Row 13:K4, P6, K4, P6, K4
Row 14: P4, K6, P4, K6, P4
Row 15:K4, P6, K4, P6, K4
Row 16: TURN ROW
Turn Row:
P4, slip 3 stitches onto cable knit hook, and be sure to hold stitches in front of work. Knit the following 3 stitches not on the hook. Taking care not to twist the stitches, knit the 3 stitches on the cable knit hook. This becomes your first cable. P4. Repeat slipping 3 stitches onto cable knit hook, knit the following 3 stitches off needle, knit 3 stitches off cable knit hook (again, making sure not to twist work), P4.
Repeat working pattern until work equal 20in.
K entire row, P entire row, K entire row.
Now to create your button holes:
P3, bind off 4 stitches, slip final bound off stitch loop back onto left needle, P3, bind off 4 stitches, slip final bound off stitch loop back onto left needle, P3, bind off 4 stitches, slip final bound off stitch loop back onto left needle, P3.
K3, cast on 4 stitches in work (see below for video), K3, cast on 4 stitches, K3, cast on 4 stitches, K3.
See above for casting on while in the middle of working
P entire row, K entire row, P entire row. Bind off.
Using quilting thread, sew on your center button first, making sure it aligns with your buttonhole, and is on the right (cable) side of the headband. Using this first button as a guide, center and sew the two other buttons on either side.
Ta-Da! Your very own comfy, cozy, hand-made head warmer that you can make yourself in the span of a Disney movie!


Wally, you're so cute! Also, the cat shirt. Mew, mew, mew!
ReplyDelete